
Tuck pointing: Ultimate 2025 | Protect Your Home
Understanding the Fundamentals of Tuck Pointing
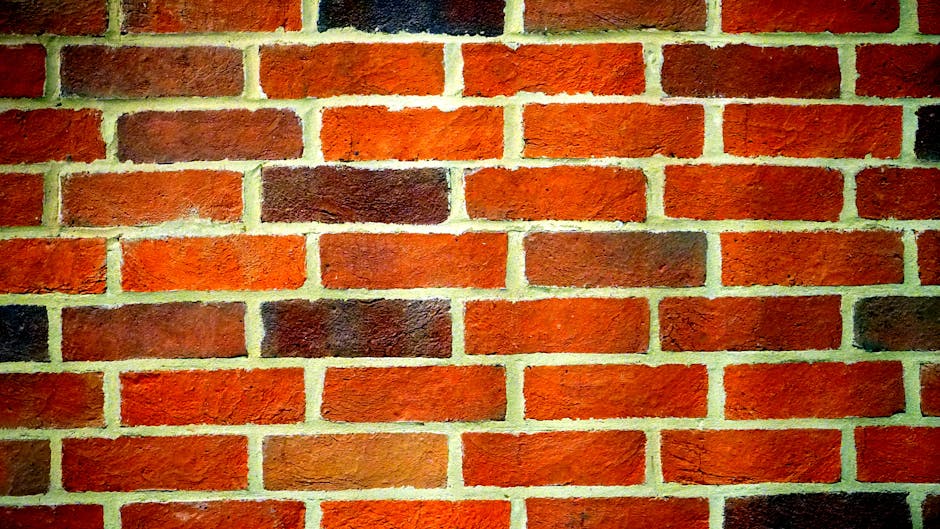
Tuck pointing is the process of removing and replacing deteriorated mortar from between bricks to restore a wall’s structural integrity and appearance. While often used interchangeably with “repointing,” traditional tuck pointing is a decorative technique using two mortar colors to create the illusion of fine joints.
What You Need to Know:
- Purpose: To repair damaged mortar joints, preventing water infiltration and structural damage.
- Typical Cost: $5-$25 per square foot.
- Lifespan: 25-30 years when done correctly.
- Key Signs: Crumbling mortar, cracks, water stains, or joints recessed more than ¼ inch.
- Best For: Historic masonry, brick chimneys, foundations, and exterior walls.
Mortar is the weakest part of a brick wall. Weather exposure, especially freeze-thaw cycles, causes it to crack and crumble over time. When this happens, water penetrates the wall, leading to accelerated deterioration, interior damage, and structural issues.
Failed mortar joints are more than a cosmetic problem; they can compromise your home’s structural integrity, increase energy costs, and lower property value. Tuck pointing prevents these costly issues while restoring your home’s curb appeal.
At Amsterdam Enterprises, our experienced team specializes in matching original mortar to ensure seamless, long-lasting repairs that protect your investment. We’ve seen how proper tuck pointing transforms a home’s structural health and appearance.

Tuckpointing vs. Repointing: Clearing Up the Confusion
Many people, including contractors, use “tuck pointing” and “repointing” interchangeably. While modern usage has blurred the lines, there is a historical difference.
Originating in 18th century England, tuck pointing was a technique to mimic expensive gauged brickwork, which featured precisely cut bricks and thin mortar joints. It was a visual trick to make ordinary bricks look like premium craftsmanship.
The Original Tuckpointing Technique
Traditional tuck pointing uses two different mortar colors to create an optical illusion. First, masons fill the joints with a base mortar colored to match the bricks, making the joints nearly invisible. Then, while the base is still wet, they press a fine line of contrasting putty (usually white) into a shallow groove. This thin ribbon, or fillet, creates the impression of razor-thin joints. This technique allowed buildings with irregular bricks to appear as if they were built with perfectly uniform materials.
When Repointing is the Right Term
Today, when we fix deteriorated mortar, we are almost always repointing. This is the functional process of removing old mortar and replacing it with new, matching mortar. The focus is on structural repair and weatherproofing, not decoration. As The Old House Handbook notes, this mortar renewal is essential for preserving any brick structure.
At Amsterdam Enterprises, most of what we call “tuck pointing” is technically repointing. The original decorative method is rare, but the term remains common.
Here’s a quick comparison:
| Feature | Traditional Tuckpointing | Repointing (Modern Usage) |
|---|---|---|
| Process | Base mortar matching brick, then thin contrasting fillet | Remove old mortar, replace with new matching mortar |
| Purpose | Aesthetic illusion of fine joints, decorative | Structural repair, weatherproofing, functional |
| Final Appearance | Crisp, thin contrasting lines | Uniform mortar joint, matches existing mortar color |
Whether you call it tuck pointing or repointing, the most important thing is that the job is done correctly with proper mortar selection and skilled application. This protects your home and keeps your brickwork looking great. For expert masonry restoration, check out more info about our Masonry services.
When Is Tuckpointing Necessary? Key Signs and Long-Term Benefits
Mortar is the weakest link in a brick wall. While bricks last for centuries, mortar deteriorates, especially in climates like Illinois and upstate New York with harsh freeze-thaw cycles. When mortar fails, water gets in, freezes, and expands, pushing bricks apart. This can lead to structural issues, water damage, and higher energy bills. Catching these problems early saves money on future repairs.

Visual Signs of Mortar Failure
Inspect your brickwork for these telltale signs that your mortar needs attention:
- Cracks or gaps: Hairline cracks can grow, and any gap larger than ¼ inch deep needs immediate action.
- Crumbling or powdery mortar: If mortar flakes away easily when prodded with a screwdriver, it has lost its strength.
- Damp patches: Dark spots on brick walls that linger after rain indicate water is penetrating through failed joints.
- White, chalky deposits (efflorescence): These salt stains are clear evidence that water is moving through your masonry.
- Loose or shifting bricks: This is the most serious sign of mortar failure and compromises your wall’s structural integrity, requiring immediate professional help.
Ignoring these signs, especially on chimneys and exposed walls, leads to water intrusion, freeze-thaw damage, and costly structural repairs.
The Lasting Benefits of Professional Tuck Pointing
Investing in professional tuck pointing provides a protective upgrade with long-term benefits:
- Restored structural integrity: New mortar rebuilds the bond between bricks, strengthening walls to bear loads and resist pressure.
- Improved weatherproofing: A continuous mortar barrier stops water penetration, which is critical in regions with freeze-thaw cycles.
- Improved curb appeal: Crisp, clean mortar joints dramatically improve a home’s appearance and market value.
- Historic building preservation: For older homes, proper tuck pointing with matched mortar is essential for maintaining historical authenticity and character.
- Improved energy efficiency: Sealing gaps and cracks in mortar joints eliminates drafts, which can help lower utility bills.
A professional tuck pointing job lasts 25 to 30 years, making it a smart investment in your property’s value and safety.
The Tuck Pointing Process: A Step-by-Step Guide
Proper tuck pointing requires skill, the right tools, and attention to detail. At Amsterdam Enterprises, our masons follow a refined process to ensure quality results. We always prioritize safety by wearing eye protection and dust masks, and we protect your property by covering windows and landscaping.

Step 1: Removing Old and Damaged Mortar
Careful removal of old mortar is the foundation of a lasting repair. We use angle grinders for large areas and hand chisels for delicate work, as detailed in Masonry Magazine’s guide on tuckpointing and repointing tools. The goal is precision, not speed, to avoid damaging the bricks.
Proper depth is critical: we remove mortar to a minimum of ¾ inch, or about twice the joint width. This ensures the new mortar has enough surface area to bond securely. After removal, we thoroughly clean every joint with brushes and vacuums to remove all dust and debris for a proper bond.
Step 2: Choosing and Mixing the Correct Mortar
Using the correct mortar is crucial for a long-lasting repair. For older homes (pre-1930s), matching the original mortar strength is essential. These homes often used softer, lime-based mortars. Using a modern, hard Portland cement mix on these softer bricks can cause the bricks to crack and spall during freeze-thaw cycles, as the mortar will be stronger than the brick.
We work with Type N, O, and K mortars to match the needs of your home. Type N is a general-purpose mortar, while the softer Type O and K mortars are ideal for historic restoration. The Brick Industry Association’s technical guide offers comprehensive details on mortar selection.
Color matching is an art. We source sand and use mineral pigments to blend the new mortar seamlessly with the old. We always prepare test patches so you can approve the final look. Proper mixing and pre-hydration are key steps that reduce shrinkage and improve strength. Learn more about our approach on our general services page.
Step 3: Applying the New Mortar
Technique is vital during application. First, we wet the joints to prevent the dry bricks from pulling moisture from the new mortar too quickly, which would weaken the bond. Using a hawk and pointing trowel, our masons pack the mortar firmly into the joints, eliminating any voids where water could collect.
We apply mortar in layers for deeper joints to ensure proper compaction and minimize shrinkage. Once the mortar has stiffened, we “tool” the joint with a specialized tool to compress and shape it. This creates a smooth, weather-resistant finish and improves the bond. Finally, we clean any excess mortar from the brick faces before it hardens.
This methodical process ensures your tuck pointing is done right the first time, protecting your masonry for decades.
Understanding Tuckpointing Costs: DIY vs. Hiring a Professional
Understanding the costs of tuck pointing and weighing a DIY approach against hiring a professional can save you money and future headaches.

Professional tuck pointing typically costs $5 to $25 per square foot. A small repair might be $100-$500, while chimney tuckpointing often runs $500-$2,500. Whole-house projects can range from $12,500 to $62,500, and foundation work can cost $5,000 to $25,000.
Prices are influenced by:
- Height and accessibility: Work requiring scaffolding costs more.
- Extent of damage: Severe deterioration requires more labor and materials.
- Mortar type: Custom lime-based mortars for historic homes are more expensive.
- Additional repairs: Damaged bricks or historic preservation requirements can add to the cost.
DIY Tuckpointing: Pros and Cons
While DIY tuck pointing can save on labor for small, accessible jobs, it has significant risks. The work is labor-intensive and time-consuming, which is why most people outsource this labor-intensive job to a pro.
The biggest cons include:
- Risk of damaging bricks: A slip with a grinder can chip or crack bricks, leading to more expensive repairs.
- Incorrect mortar matching: Using the wrong mortar strength or color can harm your brickwork and look unsightly.
- Improper bond: Incorrect mixing or application can cause the repair to fail prematurely, wasting time and money.
- Missing underlying issues: A DIY repair might only be a patch over a more significant structural problem.
Hiring a Professional Contractor
Working with a professional like Amsterdam Enterprises means you’re investing in expertise, efficiency, and peace of mind. Our masons have the experience to diagnose issues, select the right materials, and perform repairs that last for decades. We use commercial-grade tools and provide structural guarantees.
When evaluating contractors, ask about their experience, verify they are licensed, bonded, and insured, and request references. A detailed estimate should break down all costs. For more pricing details, see our page on How Much Does It Cost to Tuckpoint a 30 Bricks?.
To manage costs, get multiple estimates, address issues early, and consider scheduling work in the off-season. Clearing the work area yourself can also reduce prep time and lower your bill. For more on our services, visit our services page.
Frequently Asked Questions about Tuckpointing
What is the typical lifespan of tuckpointing?
Properly executed tuck pointing typically lasts 25 to 30 years. However, this lifespan can be affected by several factors:
- Climate: Harsh freeze-thaw cycles, like those in Illinois and upstate New York, are tough on mortar joints.
- Mortar Quality: Using the wrong type of mortar, especially one that’s too hard for the bricks, can lead to failure in just a few years.
- Exposure: Walls that face more sun, wind, and rain will wear faster than sheltered walls.
- Installation Quality: A rushed job with poor preparation or application can fail within 5-10 years.
To maximize the lifespan, avoid high-pressure washing your brickwork and ensure any repairs use properly matched mortar, as detailed in this guide on Repointing Brick Masonry.
How often does brick need to be tuckpointed?
While the general timeframe is every 25-30 years, it’s best to conduct annual visual inspections, especially after a harsh winter. Look for crumbling mortar, cracks, or stains. Catching problems early is more cost-effective.
Some areas need more frequent attention. Chimneys, parapet walls, and other highly exposed sections often require tuck pointing every 10-15 years. Older buildings with softer, historic bricks and lime-based mortars may also need more frequent, specialized care to preserve their character.
What are the challenges of tuckpointing in climates with freeze-thaw cycles?
In climates like Illinois and upstate New York, the freeze-thaw cycle is brutal on masonry. Water seeps into deteriorated mortar joints, freezes, and expands by about 9%. This expansion exerts immense pressure, pushing bricks apart and causing spalling (when the brick face flakes off).
This is why proper mortar selection is critical. If the new mortar is harder than the brick, the brick will crack under pressure. We must use a compatible mortar—typically softer and more breathable—that allows for slight movement and moisture escape. For historic homes, this often means using lime-based mortars, as specified in the Brick Industry Association’s technical guide.
Experienced masons are essential in these climates. Every detail, from removal depth to joint tooling, matters for creating a repair that can withstand dozens of freeze-thaw cycles each winter. Our team at Amsterdam Enterprises has decades of experience in these challenging conditions. If you’re concerned about your brickwork, contact us for a professional assessment.
Conclusion
Tuck pointing is more than a cosmetic fix; it’s essential maintenance that protects your home’s structural integrity and value. Failing mortar joints can lead to water damage, costly structural issues, and higher energy bills. By addressing deteriorated mortar promptly and professionally, you prevent these problems before they start.
As we’ve covered, the difference between a repair that lasts 30 years and one that fails in a few seasons comes down to experience, proper materials, and techniques custom to our climate in Illinois and upstate New York. Using the wrong mortar or improper application can cause more harm than good, potentially damaging your bricks.
At Amsterdam Enterprises, our licensed and insured team has decades of experience. We don’t just patch mortar; we diagnose underlying issues, match historical mortars, and execute repairs that are built to last. We understand that your home is your most important investment.
Whether you’re seeing crumbling joints, water stains, or simply want to restore your home’s curb appeal, don’t wait for small cracks to become big problems.

Contact Us for a professional tuckpointing assessment today. Let’s give your brickwork the expert care it deserves to protect and beautify your home for decades to come.